Step by step to learn how to paint a portrait with classic watercolor
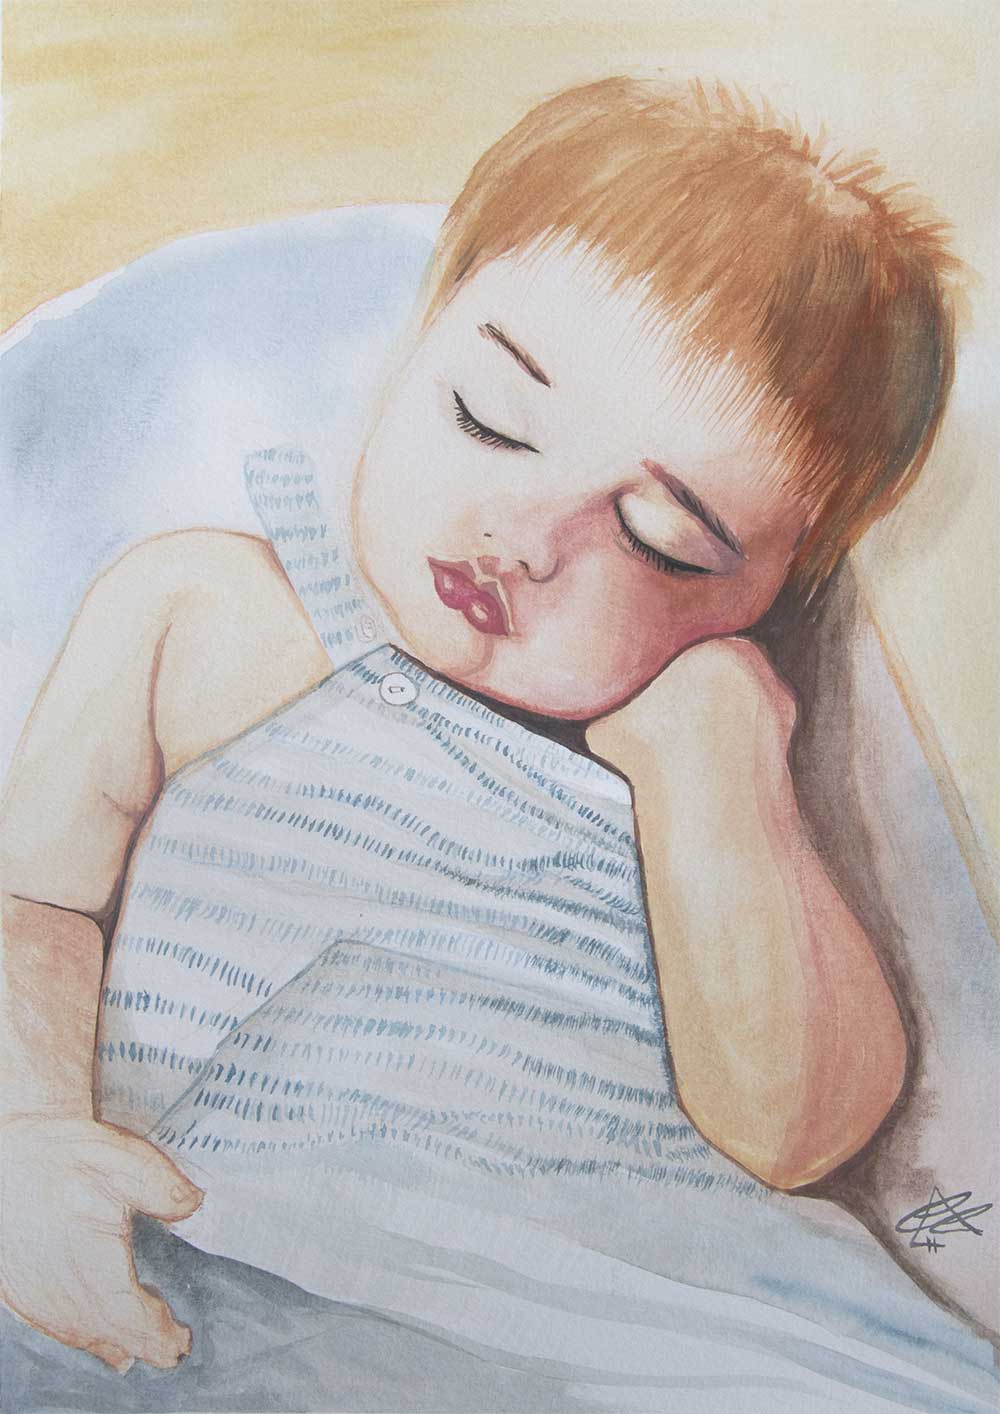
In this exercise it is about painting a 2-year-old boy sleeping. This tutorial will work for any other similar portrait where there is a certain contrast of light and shadow.
Drawing of the theme
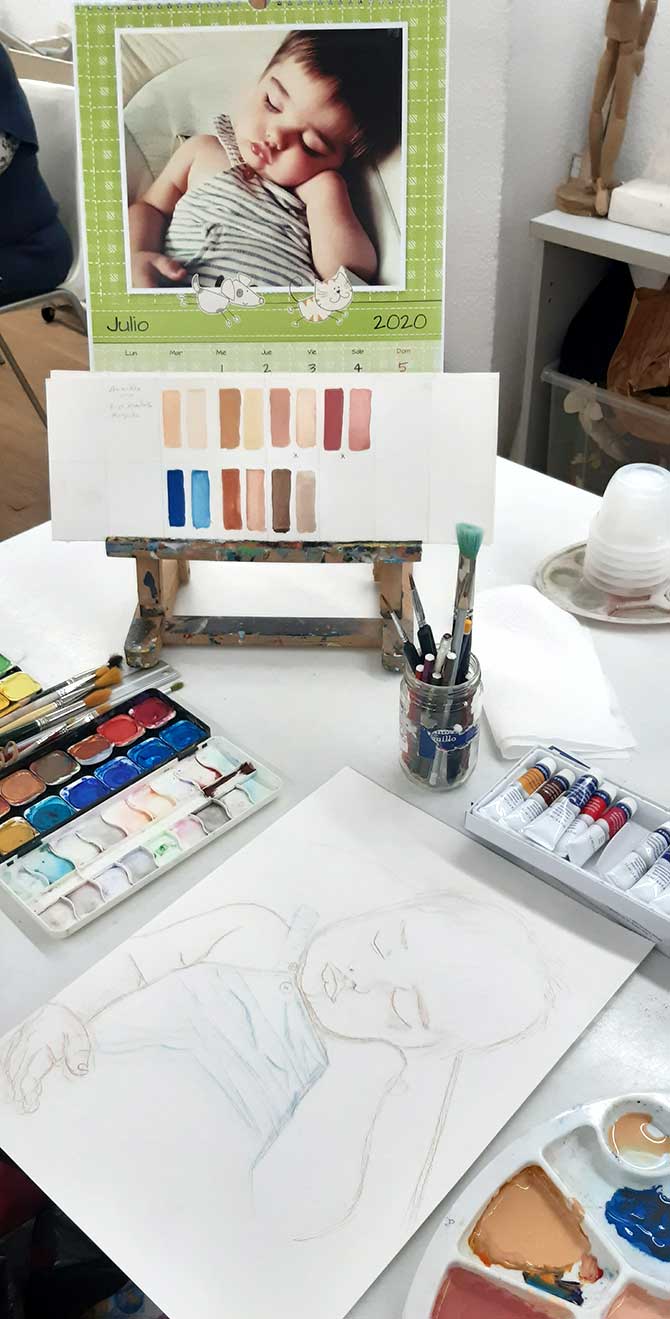
The first thing is to draw the lines of the face and the figure. We can use graphite pencil or watercolor pencils. The pencil can be erased without losing the drawing before painting and the watercolor pencils must be marked very gently to be able to dissolve them when putting water on top.
This type of drawing is called “Sensitive Line”, a very fine line. We draw the outline of the head, lips, eyes, arms and clothing.
Study of watercolor colors and color mixing
Then, we need to do a study of the colors that we are going to use. For this we are going to use some watercolor paper where we will make our samples. We paint some rectangles and we see if the color we have mixed is what we need. For example, for the colors of the skin we can mix ocher, burnt sienna, a bit of blue, cadmium yellow and magenta so that we make some mixes that are more pink, others more toasted and others more neutral or bluish. For lighter skin you can also add white watercolor, which gives more volume to the paint. For the medium tone I have used a magenta pink, a bit of cadmium yellow and a bit of ocher.
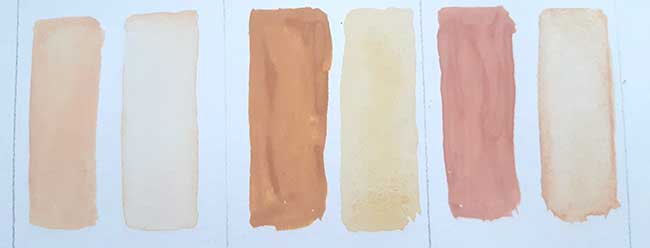
Making a small collection of color blends is good watercolor practice. So, you write down the colors used next to the color of the painted square. This serves as a cheat sheet for your next painting. Also, you can make the mixtures in small bowls that are then dried. Reusing the colors is very easy with water and does not spoil the paint.
First washes or layers of color
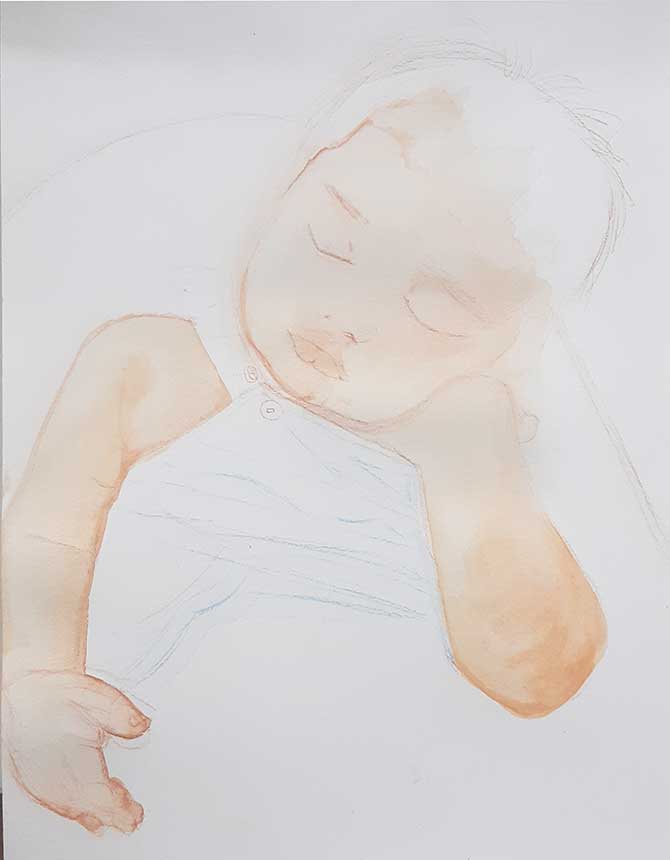
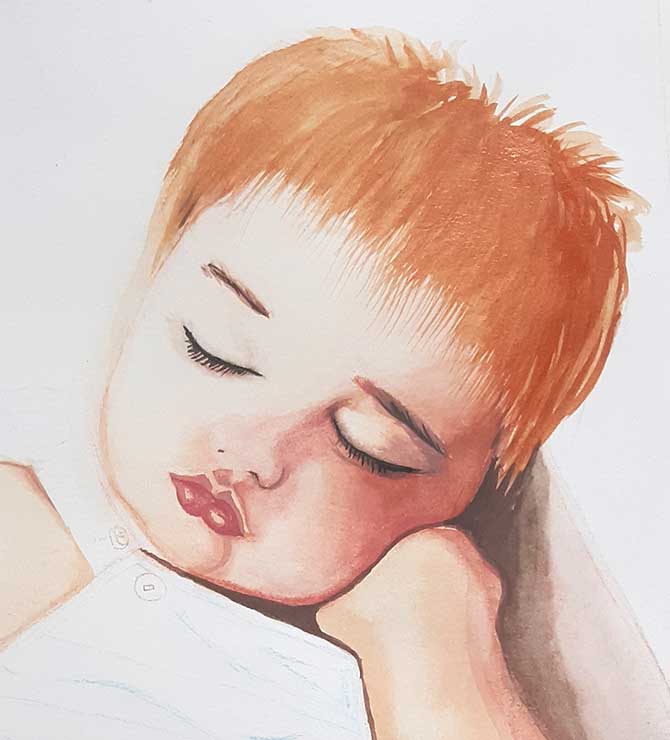
The next thing we have to do is to paint the base color on the face and arms (the skin), a wash of the lightest tone that prepares the drawing for the following stages of the process.
Watercolor has the ability to accumulate pigment in accumulations of water. With it you can play and make visual effects. For example, by tilting the support we can move the painting and make the upper area lighter.
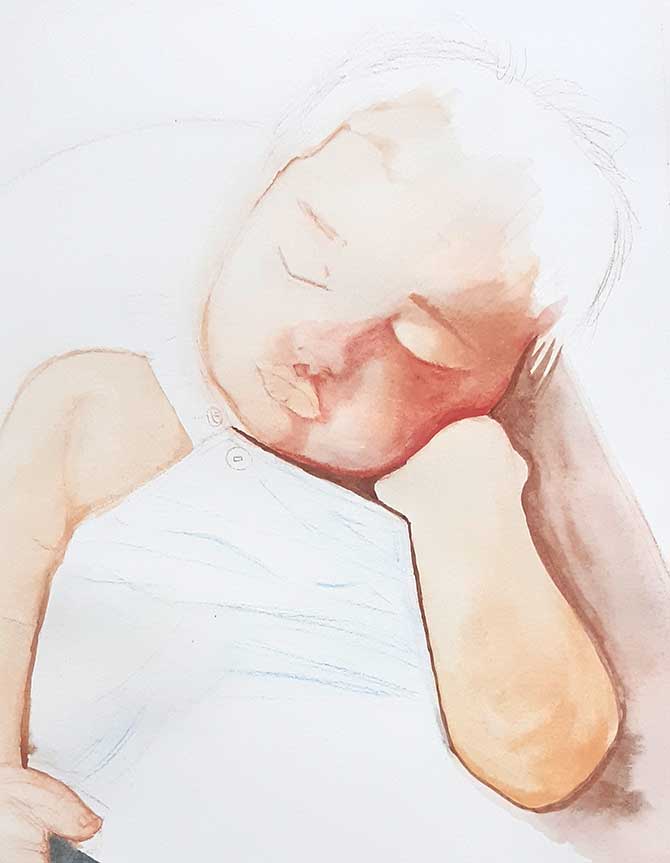
Once this first gouache has dried, the next step will be to add another gouache with a darker tone, in shadow. In this case, the right side of the face.
In watercolor it works like this: paint layers or washes and let them dry. This is how the colors are controlled.
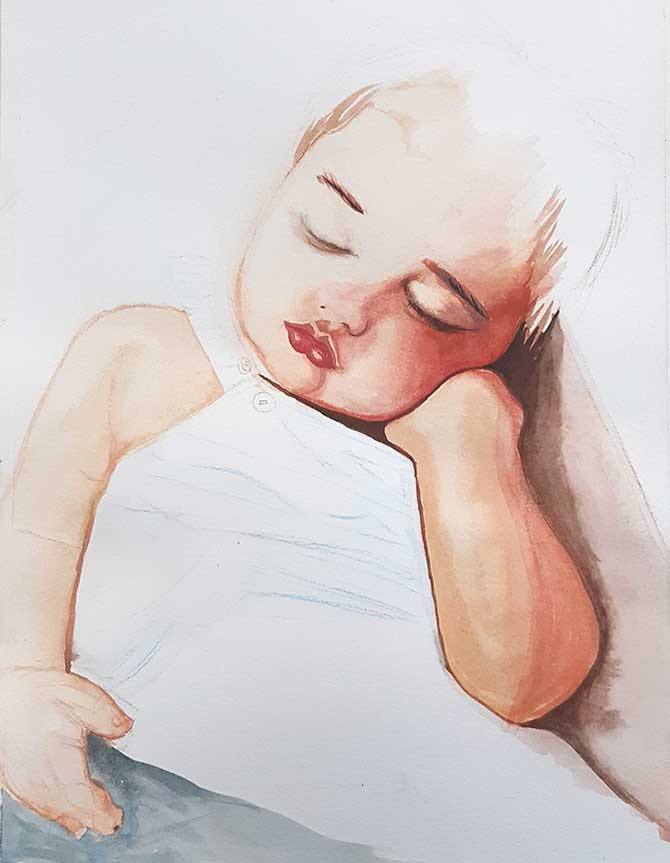
The drawing is then reinforced. With a fine brush, essential areas of the face are drawn, such as the eyes, eyebrows and mouth, whose drawing must be present. They can be colored very carefully and allowed to dry if necessary.
Paint the key areas
Maintaining the drawing is essential in the art of watercolor and for this reason you must work very slowly and with patience.
The following areas of the portrait can be attacked, such as hair, clothes, surrounding space.
On the hair I did several water layers, letting it dry, so as not to make wet on wet and create more drawing. I used a toothed brush that is used to represent the hairs on the head.
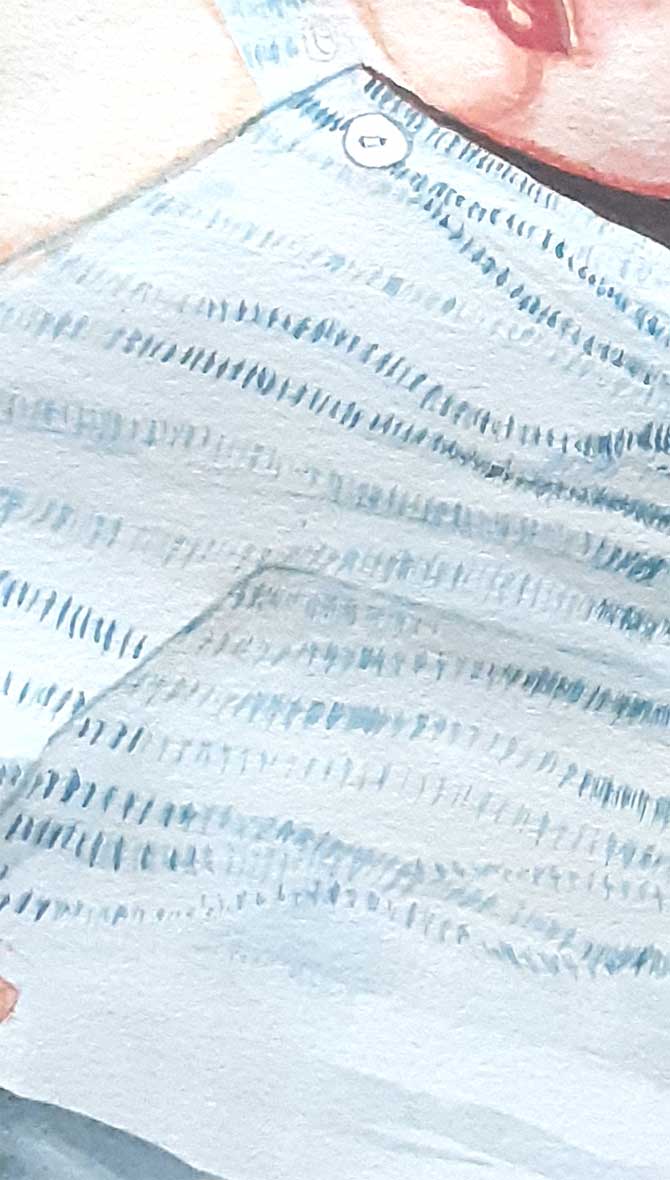
On the boy’s clothes I first painted the base tones with various water layers. I let it dry and then I made the painting of the hair lines with a toothed brush.
For the color of the seat and for the background of the image I used a painting layer and I move the support to get a faded effect.
In the last phase, the drawings of eyes, profiles, hair, etc., are usually reinforced with a dry brush or thick paint.

